8.5 KiB
title, source, author, published, created, description, tags
| title | source | author | published | created | description | tags | ||
|---|---|---|---|---|---|---|---|---|
| [Linux] Cent os DNS 세팅 방법 | https://studywithowl.tistory.com/entry/Linux-DNS-%EC%84%B8%ED%8C%85-%EB%B0%A9%EB%B2%95 |
|
2022-04-29 | 2025-01-29 | vi /var/named/reeker.zone vi /etc/named.conf vi /etc/resolv.conf vi /etc/sysconfig/network-scripts/ifcfg-enp4s0 vi /etc/named.rfc1912.zones vi /etc/hosts? named-checkzone reeker /var/named/reeker.zone named-checkconf /etc/named.conf |
|
<수정할 파일 목록 정리>
vi /var/named/reeker.zone
vi /etc/named.conf
vi /etc/resolv.conf
vi /etc/sysconfig/network-scripts/ifcfg-enp4s0
vi /etc/named.rfc1912.zones
vi /etc/hosts?
named-checkzone reeker /var/named/reeker.zone
named-checkconf /etc/named.conf <<아무 메세지 안뜬 게 OK다.
1번. named 설치
su <<관리자 root로 로그인
yum -y install named <<named 설치하기
systemctl start named << named 실행하기
systemctl enable named <<컴퓨터 킬 때 마다 named 실행 시키도록 설정
2번. named.conf 파일 수정
vi /etc/named.conf <<named.conf 파일을 아래와 같이 수정해준다.
//// named.conf//// Provided by Red Hat bind package to configure the ISC BIND named(8) DNS// server as a caching only nameserver (as a localhost DNS resolver only).//// See /usr/share/doc/bind*/sample/ for example named configuration files.//// See the BIND Administrator's Reference Manual (ARM) for details about the// configuration located in /usr/share/doc/bind-{version}/Bv9ARM.html acl trusted { 127.0.0.0; 202.31.247.157; }; options { listen-on port 53 { any; }; listen-on-v6 port 53 { any; }; directory "/var/named"; dump-file "/var/named/data/cache_dump.db"; statistics-file "/var/named/data/named_stats.txt"; memstatistics-file "/var/named/data/named_mem_stats.txt"; recursing-file "/var/named/data/named.recursing"; secroots-file "/var/named/data/named.secroots"; allow-query { any; }; allow-transfer { trusted; } ; /* - If you are building an AUTHORITATIVE DNS server, do NOT enable recursion. - If you are building a RECURSIVE (caching) DNS server, you need to enable recursion. - If your recursive DNS server has a public IP address, you MUST enable access control to limit queries to your legitimate users. Failing to do so will cause your server to become part of large scale DNS amplification attacks. Implementing BCP38 within your network would greatly reduce such attack surface */ recursion yes; dnssec-enable yes; dnssec-validation yes; /* Path to ISC DLV key */ bindkeys-file "/etc/named.root.key"; managed-keys-directory "/var/named/dynamic"; pid-file "/run/named/named.pid"; session-keyfile "/run/named/session.key";}; logging { channel default_debug { file "data/named.run"; severity dynamic; };}; zone "." IN { type hint; file "named.ca";}; include "/etc/named.rfc1912.zones";include "/etc/named.root.key";
3번. named.rfc1912.zones 파일 수정
vi /etc/named.rfc1912.zones을 통해서
named.rfc1912.zones 파일을 아래와 같이 수정한다.
// named.rfc1912.zones://// Provided by Red Hat caching-nameserver package //// ISC BIND named zone configuration for zones recommended by// RFC 1912 section 4.1 : localhost TLDs and address zones// and http://www.ietf.org/internet-drafts/draft-ietf-dnsop-default-local-zones-02.txt// (c)2007 R W Franks// // See /usr/share/doc/bind*/sample/ for example named configuration files.// zone "localhost.localdomain" IN { type master; file "named.localhost"; allow-update { none; };}; zone "localhost" IN { type master; file "named.localhost"; allow-update { none; };}; zone "1.0.0.0.0.0.0.0.0.0.0.0.0.0.0.0.0.0.0.0.0.0.0.0.0.0.0.0.0.0.0.0.ip6.arpa" IN { type master; file "named.loopback"; allow-update { none; };}; zone "1.0.0.127.in-addr.arpa" IN { type master; file "named.loopback"; allow-update { none; };}; zone "0.in-addr.arpa" IN { type master; file "named.empty"; allow-update { none; };}; zone "reeker.sm.jj.ac.kr" IN { type master; file "reeker.zone"; allow-update {none;}; allow-transfer {none;}; }; // 본인 아이피를 거꾸로 적어줘야 한다.// ipname.zone은 역방향 파일이다. zone "157.247.31.202.in-addr.arpa" IN { type master; file "ipname.zone"; allow-update {none;}; allow-transfer {none;};};
4번. resolv.conf 파일 수정
vi /etc/resolv.conf
를 입력해서 resolv.conf 파일을 아래와 같이 수정한다.
# Generated by NetworkManagersearch sm.jj.ac.krnameserver 202.31.247.157
5번. ifcfg-enp4s0 파일 수정
1번. yum install net-tools <<ifconfig 입력했을 때 command not found라고 뜰 경우 입력하는 명령어
2번. ifconfig
2번을 입력하면
enp0s3이 나오거나
enp4s0 등이 보일 수 있다. 이거에 맞춰서 3번 명령어를 입력한다.
나는 ifconfig를 입력했을 때 enp4s0이 나왔다.
3번. vi /etc/sysconfig/network-scripts/ifcfg-enp4s0
그래서 3번 명령어를 칠 때 enp4s0을 마지막에 쳐줬다.
그리고 ifcfg-enp4s0 파일을 아래와 같이 수정해줬다.
TYPE=EthernetPROXY_METHOD=noneBROWSER_ONLY=noBOOTPROTO=noneDEFROUTE=yesIPV4_FAILURE_FATAL=noIPV6INIT=yesIPV6_AUTOCONF=yesIPV6_DEFROUTE=yesIPV6_FAILURE_FATAL=noIPV6_ADDR_GEN_MODE=stable-privacyNAME=enp4s0UUID=596971a7-e874-4b81-a084-528d102b2c5bDEVICE=enp4s0ONBOOT=yesCONNECTION_METERED=yesIPADDR=202.31.247.157PREFIX=24GATEWAY=202.31.247.254DNS1=202.31.247.157
6번. 정방향 파일(reeker.zone) 생성 및 작성
cd /var/named << named로 이동한다.
vi reeker.zone <<reeker.zone 파일을 만들어준다.
$TTL 1D@ IN SOA @ ns.reeker.sm.jj.ac.kr. ( 0 ; serial 1D ; refresh 1H ; retry 1W ; expire 3H ) ; minimum NS ns.reeker.sm.jj.ac.kr. IN A 202.31.247.157 IN A 202.31.247.157ns IN A 202.31.247.157www IN A 202.31.247.157ftp IN A 202.31.247.157
reeker.zone(정방향)파일에
위의 문자를 입력해준다.
본인의 도메인과 아이피만 바꿔서 작성해주면 된다.
나는 도메인 명이 reeker.sm.jj.ac.kr.이어서
ns.reeker.sm.jj.ac.kr.으로 작성했고
내 아이피 번호는 202.31.247.157이여서
아이피 번호는 모두 202.31.247.157로 적었다.
7번. 역방향 파일(ipname.zone) 작성
cd /var/named
vi ipname.zone <<역방향 파일 생성하고, 아래와 같이 작성
$TTL 1D@ IN SOA @ ns.reeker.sm.jj.ac.kr. ( 0 ; serial 1D ; refresh 1H ; retry 1W ; expire 3H ) ; minimum NS ns.reeker.sm.jj.ac.kr. IN PTR reeker.sm.jj.ac.kr10 IN PTR reeker.sm.jj.ac.kr10 IN PTR reeker.sm.jj.ac.kr20 IN PTR reeker.sm.jj.ac.kr
8. 파일 체크
내가 작성한 파일이 오타없이 잘 작성된 파일인지
체크하는 과정이 필요하다.

reeker.zone 파일에서 작업을 다 해줬다면
터미널에 아래 명령어를 입력해준다.
named-checkzone reeker /var/named/reeker.zone
를 입력했을 때 OK라고 뜨면 잘 작성한 거다.
OK가 안 뜨고 뭔가 길게 문장이 쭉 나온
다면 오타나 공백 문제일 확률이 높다.
다시 vi reeker.zone 파일로 가서 수정할 부분 없는지 체크해보자.
9. named 재시작
systemctl restart named
systemctl status named <<active라고 잘 뜨는 지 확인
systemctl restart httpd
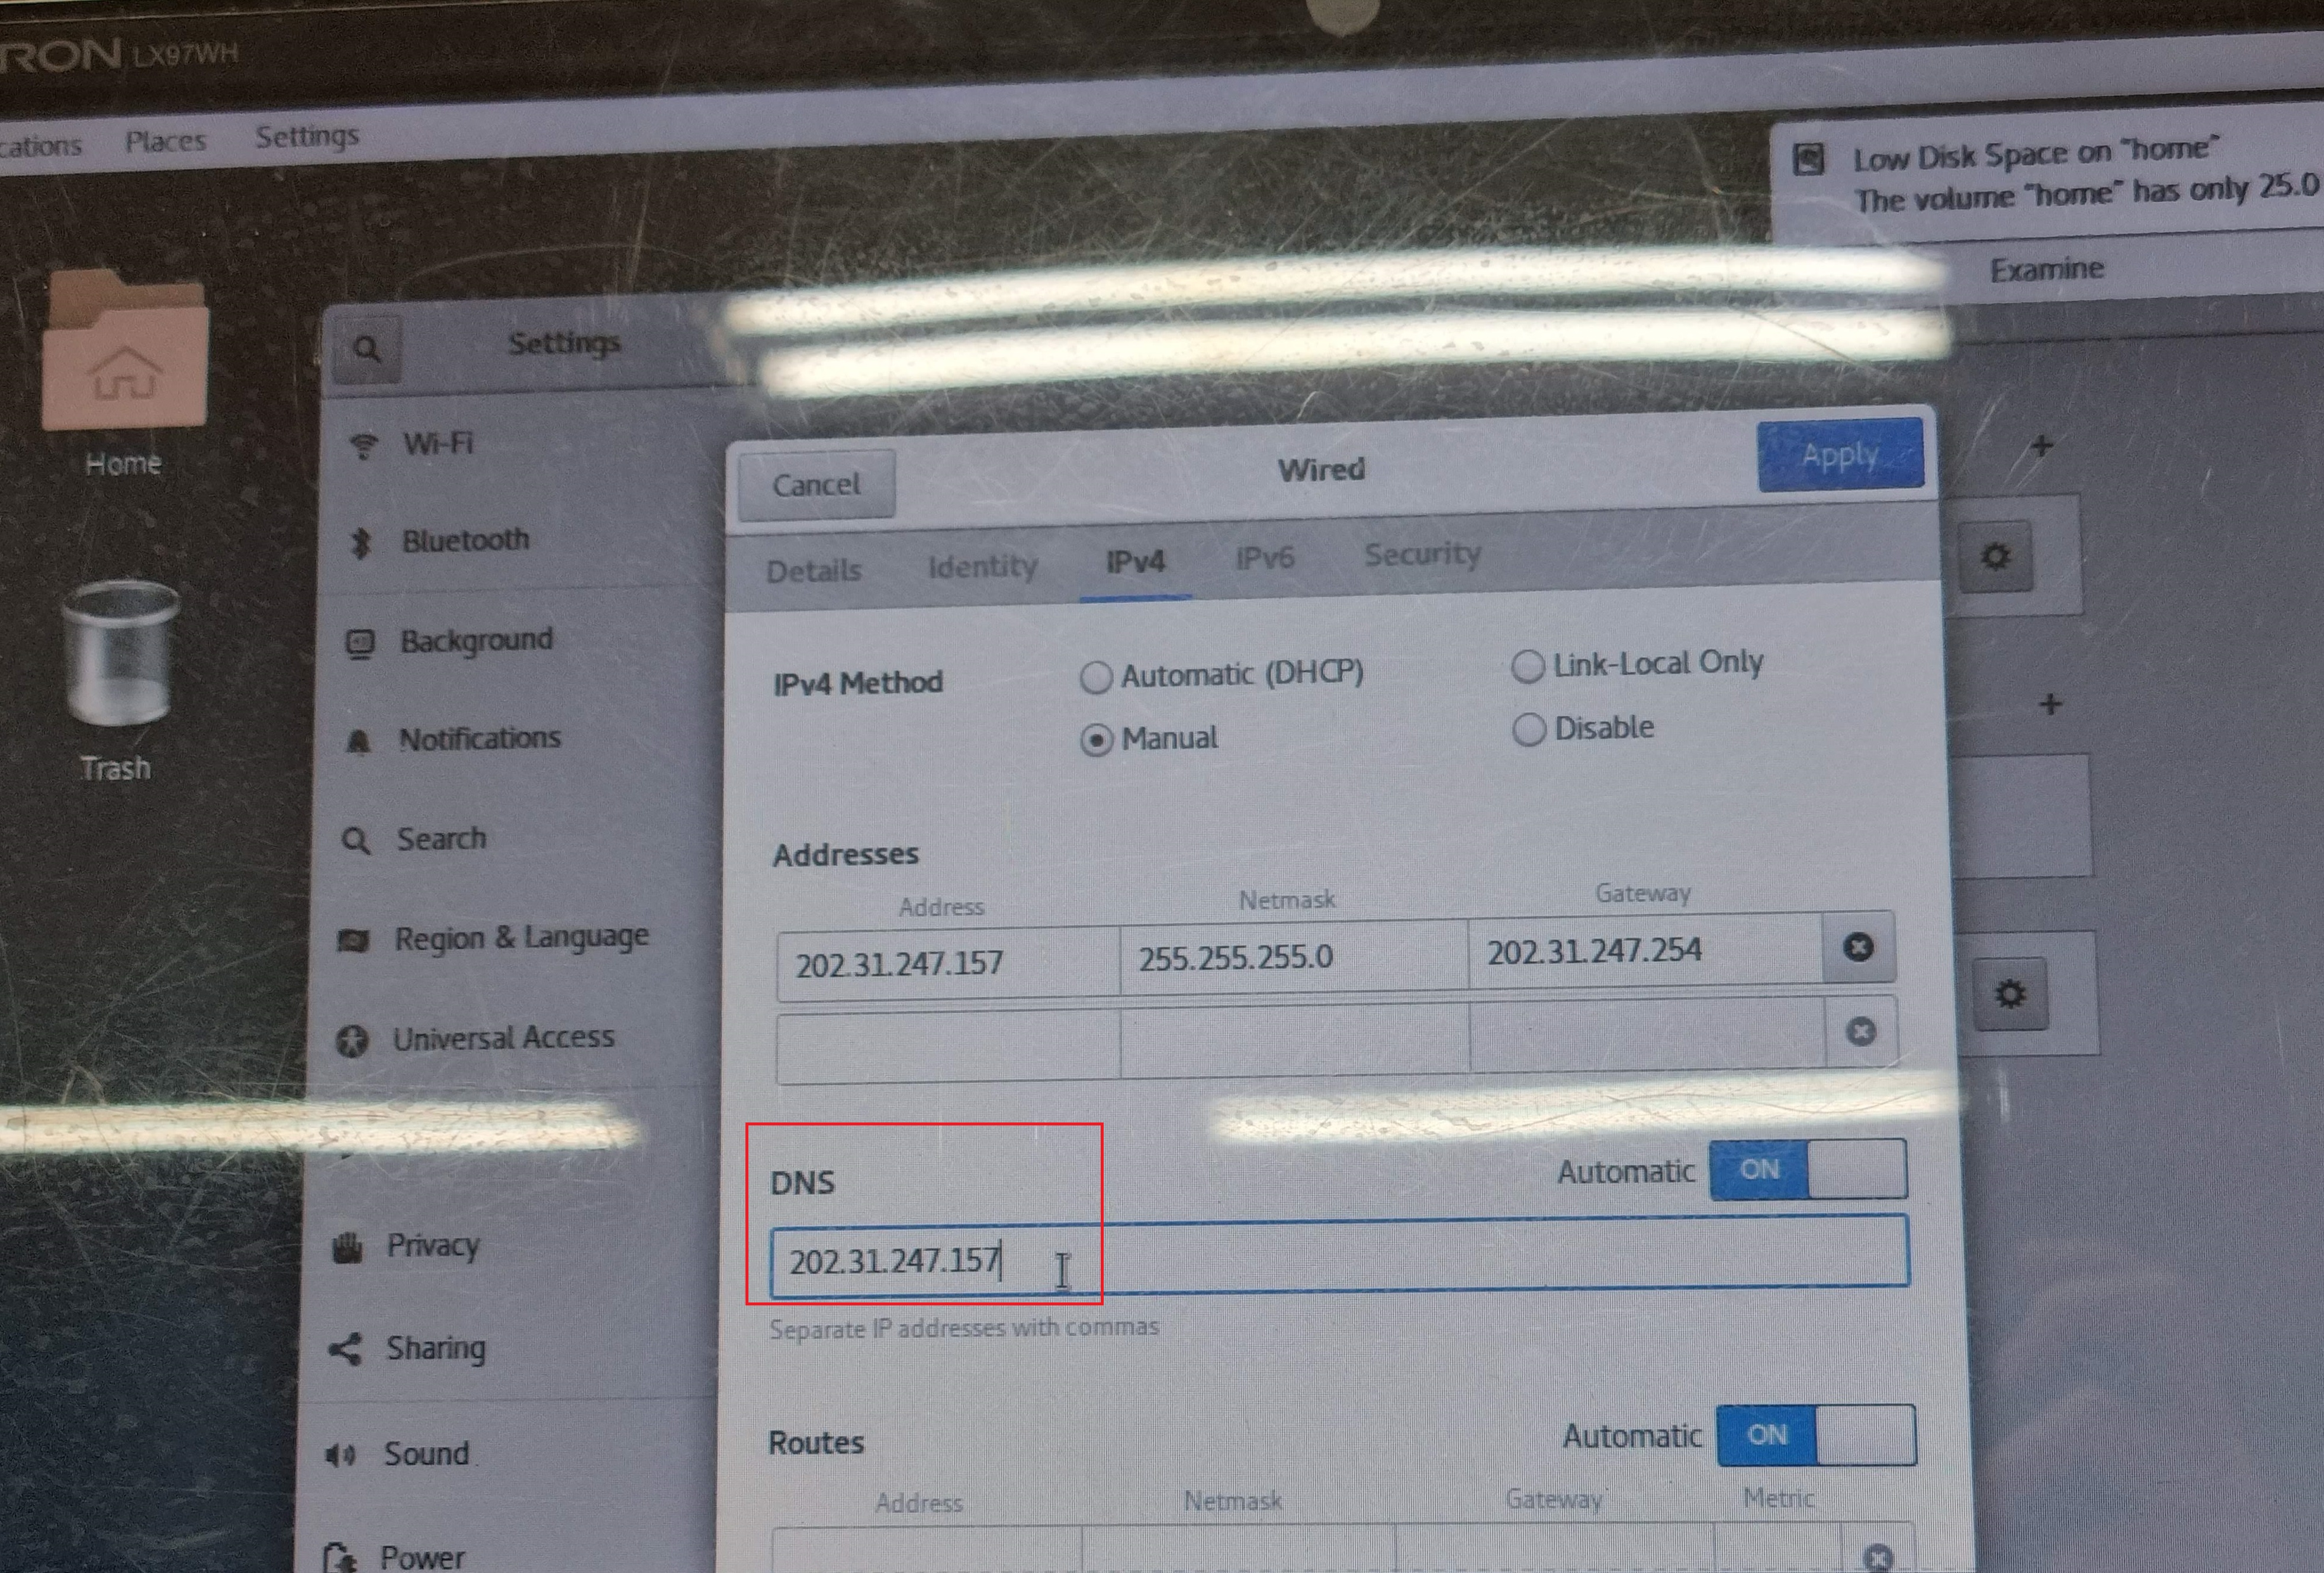
DNS란에 본인 아이피를 입력해준다.
나는 내 아이피 번호가 202.31.247.157이라 DNS란에 202.31.247.157을 입력했다.
이제 사이트에 내 아이피 치면 내 홈페이지가 뜬다.
반대로 reeker.sm.jj.ac.kr을 입력해도 내 홈페이지가 뜬다.
DNS 끝!